
The primary building facade deterioration signs depend on material and survey context, but seven consistently cited visual indicators are cracks and structural movement, spalling or flaking surface material, mortar joint erosion, rust staining, bulging or detached cladding units, efflorescence and water staining, and failed sealants or compromised glazing. These core signs should be documented on every survey; additional signs (such as interior staining or failed finishes) may also appear depending on material and location. Spotting any of these on a building exterior is not the end of the assessment; it is the beginning. The immediate first step is to photograph and document every visible symptom with location references, restrict pedestrian access beneath any area showing active displacement or falling debris, and arrange a professional safety assessment before any repair decisions are made.
Common building facade deterioration signs rarely appear in isolation. A single rust stain on a masonry wall, for instance, may indicate that a concealed lintel or anchor is corroding beneath the surface, a condition that can progress to sudden detachment long before the exterior looks structurally compromised.
- Cracks and movement: hairline to structural, horizontal, vertical, or diagonal
- Spalling and flaking: loss of surface material from masonry, concrete, or stone
- Mortar joint erosion: recessed, crumbling, or missing mortar between units
- Rust staining: brown or orange streaks indicating corroding embedded metal
- Bulging or detachment: outward displacement of cladding units or panels
- Efflorescence and water staining: white salt deposits or dark moisture tracks
- Failed sealants: cracked, shrunk, or missing joint sealant at interfaces
Key Takeaways
Facade deterioration follows a predictable progression from minor surface defects to concealed attachment failure, and early professional intervention consistently costs less and carries lower safety risk than deferred action.
| Point | Details |
|---|---|
| Seven primary visual signs | Cracks, spalling, mortar loss, rust staining, bulging, efflorescence, and failed sealants are the core indicators to document on every survey. |
| Rust staining signals concealed risk | Surface rust streaks often indicate corroding anchors or lintels that may have already lost significant load capacity. |
| Visual surveys have firm limits | Hands-on inspection and NDT are required to assess concealed attachments; surface appearance alone cannot confirm anchor condition. |
| Severity drives the response tier | Hairline cracks warrant monitoring; displacement or falling material requires same-day access restriction and specialist contact. |
| Aectechnicalsg provides structured assessment | Periodic facade inspection services cover drone triage, hands-on checks, and NDT, producing documented defect schedules with repair priorities. |
Table of Contents
- Common facade deterioration signs: what each one tells you
- What facade signs look like by material type
- How facade failures develop and what drives them
- How to inspect a facade and assess severity
- When to call a facade professional and what repairs typically involve
- Why surface appearance alone can mislead you
- The case for treating facade inspections as a non-negotiable routine
- Aectechnicalsg: professional facade inspection and repair consultancy
- Sources
Common facade deterioration signs: what each one tells you
Practical restoration guidance identifies efflorescence, mortar loss, spalling, cracked sealant, bulging, and interior staining as the most reliably visible indicators that should trigger seasonal checks and prompt follow-up. Each sign carries a different urgency level, and understanding that distinction prevents both under-reaction and unnecessary panic.
Cracks. Municipal facade guidance characterizes hairline cracks as openings less than 0.04 inches (1 mm) and links them to probable causes including freeze-thaw cycling, corrosion of embedded metal, and improper mortar composition. Hairline cracks warrant monitoring and documentation. Cracks wider than 0.04 inches, diagonal cracks at window or door corners, and step cracks following mortar joints all suggest structural movement or differential settlement and require scheduled professional assessment. Any crack accompanied by displacement or offset between adjacent units is an emergency indicator.
Spalling. Surface material breaking away from masonry, concrete, or stone exposes the substrate to accelerated moisture ingress. Spalling at isolated locations is a repair-level concern; widespread spalling across a facade elevation signals systemic deterioration and warrants urgent investigation.
Mortar joint erosion. Recessed or missing mortar removes the primary water barrier between masonry units. Erosion deeper than 0.75 inches typically requires repointing. Where mortar loss is widespread or concentrated at parapets and sills, the risk of water penetration into the wall assembly increases substantially.
Rust staining. Brown or orange streaks running from joints, lintels, or window frames are among the most consequential signs on any facade. Rust staining can indicate corroding anchors, ties, or lintels concealed within the wall, conditions that may have already compromised structural capacity well before the surface shows obvious distress.
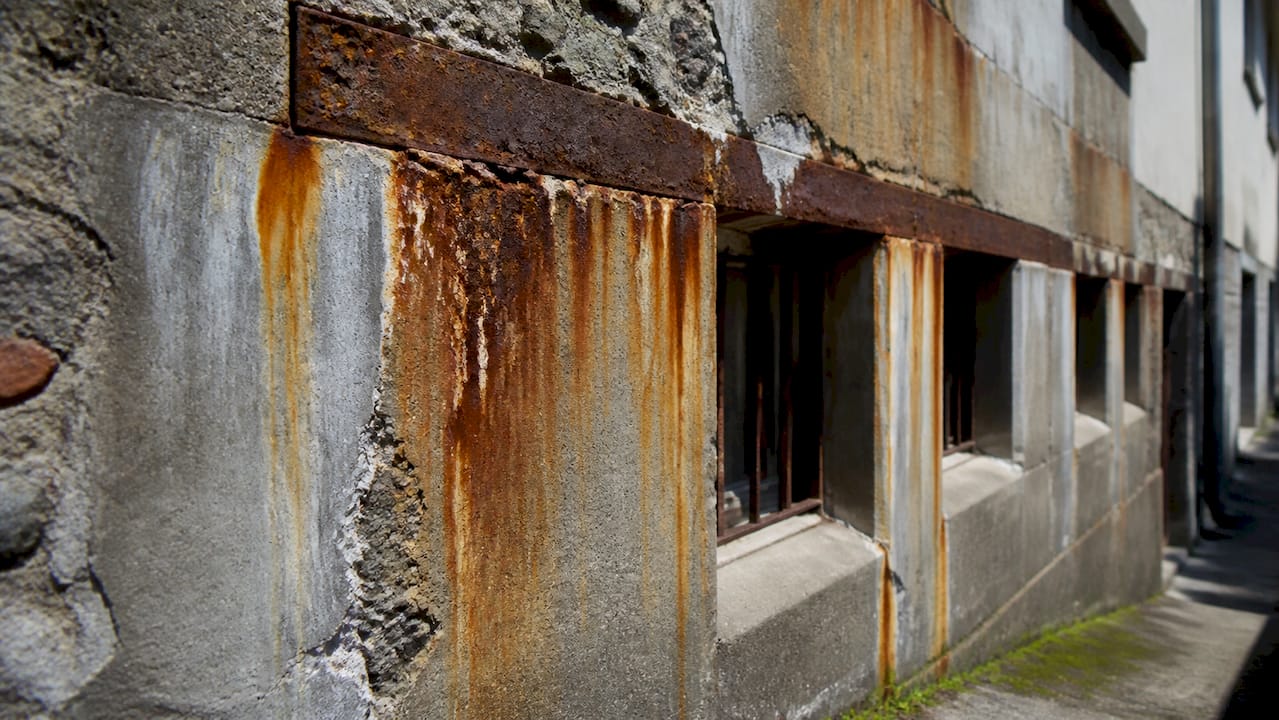
Bulging or detachment. Any outward displacement of a cladding unit, panel, or masonry section is an emergency-level sign. Even minor bulging suggests that the attachment between the cladding and its backup structure has been compromised.
Efflorescence. White crystalline deposits form when water moves through masonry and carries soluble salts to the surface. Efflorescence itself does not damage the material, but its presence confirms active moisture migration through the wall assembly.
Failed sealants. Cracked, shrunken, or missing sealant at expansion joints, window perimeters, and panel interfaces allows water to enter the facade system. Sealant has a finite service life, typically 10–20 years depending on product type and exposure, and its failure is one of the most preventable causes of water ingress.
Statistic note: Industry analysis estimates that facades can account for up to 35% of total building construction cost, which places the financial stakes of deferred facade maintenance in clear perspective.
What facade signs look like by material type
Facade symptoms vary significantly by cladding material. The same underlying cause, water ingress, for example, produces different visible indicators on brick than on EIFS or glazed curtain wall. A material-specific reference prevents misdiagnosis.
Brick and masonry
What to look for:
- Step cracking along mortar joints (differential settlement or thermal movement)
- Horizontal cracking at shelf angles or lintels (corrosion-driven expansion)
- Spalling brick faces (freeze-thaw, moisture saturation)
- Efflorescence at sills, parapets, and weep hole locations
- Mortar erosion deeper than 0.75 inches
Probable causes: Freeze-thaw cycling, corroding shelf angles or lintels, inadequate flashing at sills and parapets, and mortar composition mismatch between historic lime mortars and modern cement-based repointing. Older lime-rich mortars are more tolerant of movement; replacing them with stiff cement mortars can transfer stress to the brick units themselves, causing cracking and spalling at the unit faces rather than at the joints.
Urgency flags: Horizontal cracking at lintel level or outward rotation of a parapet wall are emergency indicators. Concentrated efflorescence at a single location that was previously dry warrants prompt investigation for flashing failure.
Concrete
What to look for:
- Map cracking (crazing) across panel surfaces
- Delamination: hollow sound when tapped, visible separation at edges
- Exposed and corroding reinforcing steel
- Carbonation-related spalling at cover zones
- Staining patterns tracing rebar locations
Probable causes: Carbonation of concrete cover, chloride ingress in coastal environments, inadequate cover to reinforcement, and alkali-silica reaction (ASR) in certain aggregate combinations. Once rebar corrodes, the expansion of corrosion products (rust jacking) fractures the surrounding concrete, accelerating spalling.
Urgency flags: Exposed rebar, active delamination, or spalling at connection zones between precast panels are emergency-level conditions.
Natural stone
What to look for:
- Surface scaling or granular disintegration
- Staining from iron inclusions within the stone
- Cracking at thin sections (sills, copings, carved details)
- Biological growth in recessed joints
Probable causes: Freeze-thaw saturation, acid rain attack on carbonate stones (limestone, marble), and iron sulfide inclusions oxidizing within the stone matrix.
Urgency flags: Cracking at copings or projecting elements, and any stone unit that sounds hollow when tapped.
Terra-cotta
IIBEC analysis specifically identifies terra-cotta detachment as a high-risk failure mode resulting from corrosion of steel attachments and prolonged moisture exposure in historic details with limited ventilation. Terra-cotta units can appear intact on the surface while their internal anchors have corroded to near-zero capacity.
What to look for:
- Cracked or missing glaze
- Spalling at anchor locations
- Units that sound hollow or move when pressed
- Rust staining at joints or anchor points
Probable causes: Anchor corrosion, freeze-thaw cycling, and moisture trapped in unventilated cavities behind ornamental units.
Urgency flags: Any unit at elevation that moves, sounds hollow, or shows rust at its anchor point requires immediate hands-on inspection and likely temporary stabilization.
Metal panels and cladding
What to look for:
- Corrosion at panel edges, fasteners, or cut surfaces
- Sealant failure at panel joints
- Oil-canning (visible waviness in flat panels, a cosmetic issue but a sign of installation stress)
- Fastener pull-through or elongated fastener holes
Probable causes: Galvanic corrosion between dissimilar metals, inadequate sealant maintenance, and thermal movement exceeding panel connection tolerance.
Urgency flags: Fastener failure or panel displacement at any elevation.
EIFS (Exterior Insulation and Finish Systems)
What to look for:
- Soft or spongy areas when pressed (moisture-saturated insulation board)
- Cracks at window and door corners
- Staining below penetrations
- Delamination of the finish coat
Probable causes: Failed sealant at penetrations and terminations, inadequate drainage provisions, and impact damage breaching the finish coat. EIFS is particularly vulnerable to moisture accumulation because the system has limited capacity to drain once water enters.
Urgency flags: Soft areas near windows or at grade level, and any crack that penetrates through the base coat.
Glazing and curtain wall
What to look for:
- Failed or missing gaskets and sealant at glass-to-frame interfaces
- Condensation between double-glazed panes (seal failure)
- Cracked or shattered glass units
- Corrosion at aluminum frame joints or steel mullions
Probable causes: Thermal cycling, UV degradation of gaskets, and inadequate drainage within the glazing pocket.
Urgency flags: Any cracked structural glass unit or displaced glazing panel.
Pro tip on location-based risk: Parapets, cornices, lintels, sills, and balcony soffits concentrate more deterioration than mid-wall surfaces because they receive direct water exposure from above and below. Prioritize these zones in every visual survey.
Pro Tip: When conducting a visual survey, always check the inside face of exterior walls at the same locations where you see exterior staining or cracking. Interior water staining directly behind an exterior rust streak is a strong indicator of active anchor or lintel corrosion.
How facade failures develop and what drives them
Understanding the progression from a minor surface defect to a major structural failure helps building managers allocate inspection resources and make repair timing decisions with greater confidence.
Primary failure drivers
| Cause | Mechanism | Visual Indicator |
|---|---|---|
| Water ingress | Penetrates joints, saturates backup, corrodes metal | Efflorescence, staining, rust streaks |
| Freeze-thaw cycling | Expands water in pores and cracks, fractures material | Spalling, scaling, mortar loss |
| Corrosion of embedded metal | Rust products expand, fracture surrounding material | Rust staining, cracking, spalling |
| Thermal movement | Differential expansion between materials | Cracks at interfaces, sealant failure |
| Differential settlement | Foundation or structural movement | Diagonal or step cracking |
| Detailing and design failures | Inadequate flashing, drainage, or joint provision | Concentrated water damage at specific zones |
| Pollution and acid attack | Chemical dissolution of carbonate materials | Surface erosion, granular disintegration |
Typical progression timeline
A small defect rarely stays small without intervention. The general progression follows a recognizable sequence:
- Initial defect: A hairline crack, failed sealant joint, or inadequate flashing allows water entry.
- Moisture ingress: Water penetrates the cladding and reaches the backup structure or embedded metal.
- Material degradation: Freeze-thaw cycling fractures porous material; moisture accelerates carbonation in concrete.
- Concealed attachment deterioration: Anchors, ties, or lintels begin corroding. No visible surface sign may be present at this stage.
- Surface distress: Rust staining, spalling, or cracking appears as corrosion products expand (rust jacking).
- Detachment risk: Cladding units lose attachment capacity. Displacement or detachment becomes possible under wind or seismic load.
Coastal environments, regions with significant freeze-thaw cycles, and urban areas with elevated pollution accelerate every stage of this progression. A facade in a northern U.S. climate experiencing 30 or more freeze-thaw cycles per year will reach stage 4 or 5 significantly faster than the same facade in a temperate southern climate. Proper facade detailing at the design stage is the most cost-effective intervention in this sequence because it prevents moisture entry before the cycle begins.
How to inspect a facade and assess severity
A structured inspection workflow produces defensible documentation and clear triage decisions. The four-level approach below moves from low-cost remote observation to targeted intrusive investigation.
Inspection levels
- Remote visual walkthrough. Conducted from grade level using binoculars. Identifies gross defects: large cracks, visible displacement, staining patterns, and missing units. Photographs should be geotagged and keyed to an elevation drawing.
- Drone survey. Highly effective for initial triage of tall facades, rapidly identifying delaminated panels, staining patterns, and parapet conditions without scaffolding. Drone facade inspection workflows can cover large elevations in a fraction of the time required for rope access or scaffold-based surveys.
- Hands-on close-up inspection. Conducted from scaffold, swing stage, or rope access. Allows direct measurement of crack widths, sounding of masonry and concrete for delamination, and assessment of sealant condition. This level is required to confirm or rule out conditions identified remotely.
- Non-destructive testing (NDT) and exploratory openings. Infrared thermography identifies moisture-saturated zones and delamination. Borescope inspection accesses concealed cavities. Pull-out tests assess anchor capacity. Exploratory openings (removing a cladding unit or cutting a small access panel) provide direct visual access to concealed attachments. This is the only reliable method for assessing anchor and tie condition on older facades.
What to photograph, measure, and record
- Crack locations, orientations, and widths (use a crack comparator card)
- Spalling dimensions and depth
- Mortar joint condition and recess depth
- Staining patterns with extent measurements
- Sealant condition at all joint types
- Any displacement or offset between adjacent units
Severity matrix
| Sign | Severity | Recommended Action |
|---|---|---|
| Hairline cracks (less than 0.04 in.) | Low | Monitor; photograph and re-check in 6 months |
| Mortar erosion, isolated efflorescence | Low-Medium | Schedule repointing or sealant replacement within a year |
| Spalling at isolated locations | Medium | Schedule repair; investigate cause |
| Rust staining at joints or lintels | Medium-High | Hands-on inspection to assess concealed metal condition |
| Structural cracks, step cracking | High | Professional assessment within 30 days |
| Bulging, displacement, hollow-sounding units at elevation | Emergency | Restrict access; contact specialist immediately |
| Falling material, open joints exposing anchors | Emergency | Restrict access; same-day specialist response |
Municipal building-safety guidance categorizes defects into non-structural cracks, spalling, structural cracks, and defective finishes, and links each category to owner action tiers that align closely with the matrix above.
A comprehensive inspection guide covering visual, detailed, and intrusive inspection types provides further detail on recommended inspection frequencies and documentation standards.
Seasonal cleaning and inspection routines increase the probability of early detection, particularly for moisture-driven damage that develops over winter and becomes visible in spring.
When to call a facade professional and what repairs typically involve
Escalation criteria: when professional help is not optional
- Immediate danger: Any falling material, visible displacement of a cladding unit, or open joint exposing an anchor requires same-day specialist response and access restriction.
- Probable concealed attachment failure: Rust staining at anchor locations, hollow-sounding units at elevation, or terra-cotta units that move when pressed.
- Active interior leaks: Water penetrating to interior finishes following rain events, particularly at locations corresponding to exterior staining.
- Widespread spalling or cracking: Defects covering more than a localized area on any elevation, or any structural crack pattern.
- Post-event assessment: Following seismic activity, high-wind events, or vehicle impact, a professional survey is warranted regardless of visible damage.
Periodic facade inspection services provide structured assessment protocols that cover all four inspection levels and produce documented findings with repair priority rankings.
Common repair types, timelines, and cost shapes
| Repair Type | Typical Scope | Approximate Timeline | Cost Shape (U.S.) |
|---|---|---|---|
| Repointing | Mortar joint replacement | 1–4 weeks per elevation | Low-medium per linear foot |
| Crack repair and patching | Epoxy injection, patching compounds | Days to 2 weeks | Low per location |
| Sealant replacement | Joint sealant removal and replacement | 1–3 weeks | Low-medium per linear foot |
| Anchor replacement | Supplemental or replacement anchors | 2–6 weeks | Medium-high; access-dependent |
| Localized unit replacement | Individual brick, stone, or terra-cotta units | 1–4 weeks | Medium; unit cost plus access |
| Surface restoration | Cleaning, consolidant application, coating | 2 weeks or longer | Medium |
| Full recladding | Complete removal and replacement of cladding system | Months | High |
Cost ranges for facade repair in the U.S. vary substantially by building height, access method, material type, and regional labor rates. Ballpark figures for repointing typically run from $3 to $25 per linear foot depending on joint depth and access; full recladding of a mid-rise building can reach several million dollars. These are orientation figures only; a professional assessment and competitive bidding process are required for any specific project.
Most structural facade repairs in the U.S. require building permits, and work affecting structural elements or occupied public space typically requires a licensed engineer of record. Emergency stabilization work may proceed under emergency permit provisions, but documentation and follow-up permit applications are still required in most jurisdictions.
Pro Tip: Request that any facade contractor provide a written scope of work that distinguishes between cosmetic repairs and structural repairs. Cosmetic work that conceals an unresolved structural condition can create liability and accelerate hidden deterioration.
Why surface appearance alone can mislead you
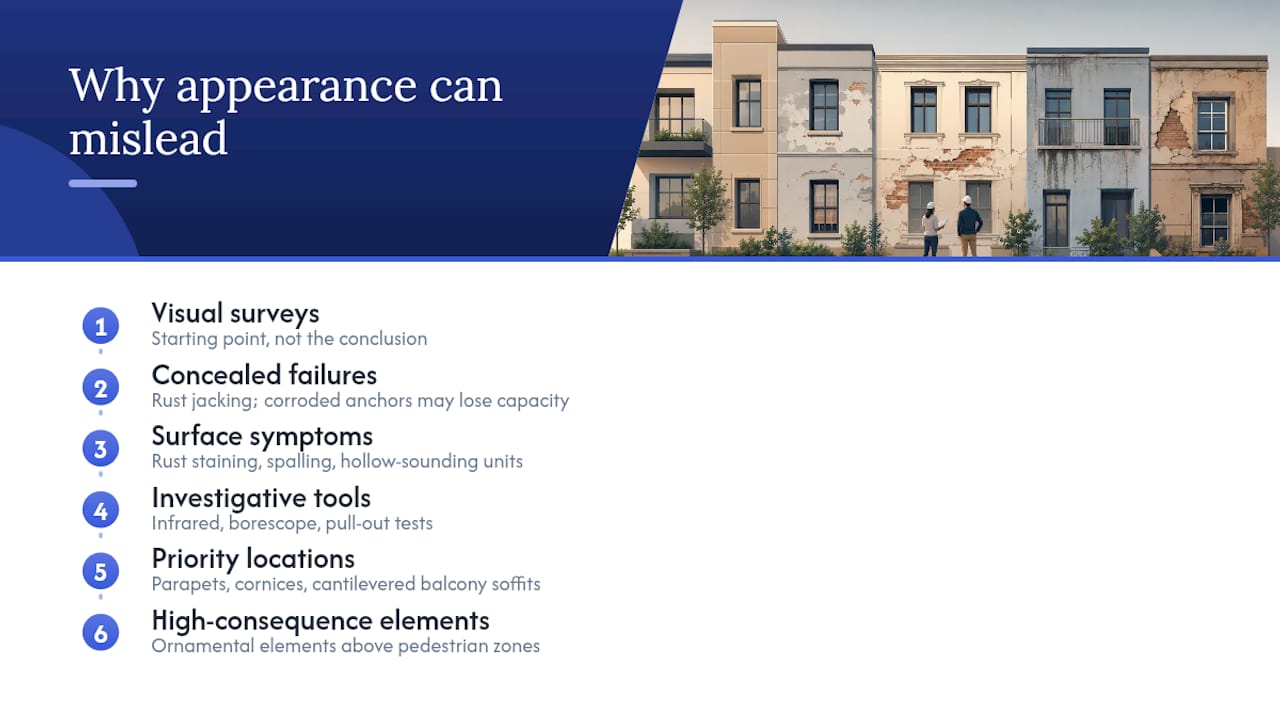
Visual surveys are the starting point of any facade assessment, not the conclusion. The most dangerous facade conditions are often the least visible ones, and understanding why requires a brief look at the mechanics of concealed failure.
Rust jacking is the process by which corrosion products forming on embedded steel anchors, ties, or lintels expand within the confined cavity they occupy. Corrosion products can occupy several times the volume of the original steel, generating pressure that fractures surrounding masonry or terra-cotta from within. The visible spall or crack at the surface is typically the final stage of a corrosion process that may have been advancing for years or decades. By the time rust staining appears on the exterior face, the anchor or lintel may have already lost a substantial portion of its load-carrying capacity.
Concealed anchor deterioration presents a related problem. On older facades with embedded steel anchors or wire ties, the condition of those connections cannot be determined from the exterior surface alone. A facade that appears sound, with no visible cracking or displacement, can have anchors that have corroded to near-zero capacity. IIBEC guidance specifically recommends hands-on inspections and anchor review for elevated ornamental elements, precisely because visual appearance provides no reliable indication of anchor condition.
The limits of visual-only surveys are well established in the industry. Infrared thermography can identify moisture-saturated zones and delamination that are invisible to the naked eye. Borescope inspection allows direct viewing of concealed cavities. Pull-out tests quantify anchor capacity. When a facade shows any rust staining, hollow-sounding units, or a history of water ingress, these investigative tools move from optional to necessary.
The NYC facade glossary links surface symptoms such as rust staining and spalling directly to probable concealed causes, reinforcing the principle that surface signs are indicators, not the full picture.
Pro Tip: Prioritize hands-on inspection and anchor review at parapets, cornices, cantilevered balcony soffits, and any ornamental element above a pedestrian zone. These locations combine the highest consequence of failure with the greatest likelihood of concealed attachment deterioration.
The case for treating facade inspections as a non-negotiable routine
Facade deterioration is not a problem that announces itself clearly or on a convenient schedule. The pattern that appears repeatedly in practice is one of deferred attention: a rust stain noted but not investigated, a crack photographed but not measured, a sealant failure observed but not repaired before the next winter. Each deferral compresses the time between a manageable repair and a costly emergency.
Routine inspections, documented with photographs and elevation drawings, create the baseline that makes progressive deterioration visible. Without that baseline, it is genuinely difficult to determine whether a crack has widened, whether staining is new, or whether a previously noted condition has stabilized or worsened. Routine condition assessments before major maintenance cycles give facility managers exactly that reference point.
The financial argument for early intervention is straightforward. Repointing a mortar joint costs a fraction of replacing a spalled brick unit, which costs a fraction of replacing a section of facade after anchor failure. The engineering argument is more urgent: concealed attachment failures do not give visible warning before detachment. Proactive inspection, including hands-on and NDT methods where risk is elevated, is the only reliable way to stay ahead of that failure mode.
For building managers and property owners who want a structured, defensible inspection program, Aectechnicalsg’s periodic facade inspection services provide the technical depth, documentation standards, and professional accountability that a self-directed visual survey cannot replicate.
Aectechnicalsg: professional facade inspection and repair consultancy

Identifying facade deterioration signs is the first step. Knowing what to do next, and having qualified professionals to carry it out, is what prevents a documented defect from becoming a safety incident or a seven-figure repair bill.
Aectechnicalsg provides periodic facade inspection and assessment services that cover all four inspection levels: remote visual survey, drone triage, hands-on close-up assessment, and non-destructive testing where conditions warrant. Every engagement produces a structured defect schedule with severity ratings, photographic documentation, and prioritized repair recommendations. For building owners and managers who have identified concerning signs and need a professional assessment to determine next steps, the process begins with a consultation. Contact Aectechnicalsg directly through Aectechnicalsg to arrange an assessment.
Sources
The following sources provide illustrated symptom references, technical definitions, and inspection procedure guidance for building owners, managers, and construction professionals.
- Facade Conditions – An Illustrated Glossary of Visual Symptoms
- Facade Failures: Common Types, Causes, and Lessons Learned | IIBEC
- Building Defects – Buildings Department
- Top Ways to Improve Building Cleanliness in 2026