
If concrete is actively falling or reinforcement steel is visibly exposed, isolate the area immediately and arrange a professional condition assessment before any repair work begins. Not every spall is an emergency — hairline surface pitting is often cosmetic, while rust streaking near a beam or column signals active corrosion that needs structural repair guidance sooner rather than later.
Before that assessment happens:
- Cordon off the area beneath any overhead spalling and rig catch netting if pedestrians pass underneath.
- Add temporary propping if a structural member looks compromised.
- Book a condition assessment with a qualified inspector or structural engineer as your next concrete step, not a general handyman quote.
Key Takeaways
Spalling concrete repair succeeds only when the source water is stopped, corroded rebar is properly treated, and the repair material matches the surrounding concrete’s structural properties.
| Point | Details |
|---|---|
| Diagnose before patching | Rust streaks or hollow sounds mean corrosion has likely been active for years; get testing before repair. |
| Fix water first | Repairs placed over an active leak or moisture path will delaminate again within a short time. |
| Match materials to severity | Neat epoxy suits minor cosmetic spalls; structural damage needs polymer-modified mortar or batched concrete. |
| Verify the bond | A pull-off test after cure, targeting roughly 1 MPa, confirms the repair actually adhered. |
| Bring in Aectechnicalsg for structural cases | Aectechnicalsg provides condition surveys, repair specifications, and authority submission support for spalling that touches load-bearing elements. |
Table of Contents
- How Spalling Concrete Develops and the Early Warning Signs
- When Do You Need a Structural Engineer vs. a Contractor?
- What Are the Repair Stages for Spalling Concrete?
- Which Repair Materials Suit Which Severity Level?
- How Do You Prevent Spalling Concrete From Coming Back?
- How Much Does Spalling Concrete Repair Cost and Take?
- What Should a Repair Specification Actually Include?
- Why Specification-Led Repair Beats a Quick Patch Every Time
- Sources
How Spalling Concrete Develops and the Early Warning Signs
Spalling concrete almost always starts below the surface, long before it shows. Chloride ions from coastal air, de-icing salts, or contaminated water penetrate the concrete cover and reach the embedded rebar. Carbonation does something similar by neutralizing the concrete’s natural alkalinity over decades. Either process strips away the passive layer that normally protects steel from rust. Once the steel corrodes, it expands significantly, and that expansion cracks and pushes off the concrete around it.
Watch for these signs, roughly in order of severity:
- Fine hairline cracking or a dull, hollow sound when tapped with a hammer.
- Rust streaking bleeding through paint or render.
- Blistering or peeling surface coatings over a specific patch.
- Flaking or delaminated concrete that lifts away in flakes or chips.
- Exposed aggregate or visible corroded reinforcement.
By the time you see any of the later signs, corrosion has usually been active for years, not months, and the visible damage is frequently smaller than what’s hidden behind it. A patch the size of a dinner plate can sit above rebar corrosion that extends well past the edges you can see.
When Do You Need a Structural Engineer vs. a Contractor?
Some spalling is a maintenance job. Some is a safety issue. The line between the two comes down to location, extent, and what the reinforcement looks like once it’s exposed.
Call a structural engineer immediately if you see:
- Concrete falling or loose material overhead in a beam, slab soffit, or column.
- Exposed rebar with visible pitting or section loss, not just surface rust.
- Spalling concentrated in a load-bearing beam or column rather than a non-structural wall or parapet.
- Damage that has visibly spread or worsened over a few months.
A proper assessment goes beyond a visual walkthrough. Engineers typically combine sounding (tapping for hollow spots), impact-echo or ground-penetrating radar for subsurface delamination, and lab testing like chloride profiling or carbonation depth checks to confirm what’s driving the corrosion. The output should be a written repair specification, not a verbal opinion, and if the damage affects a load path, expect the scope to include authority submission requirements.
Pro Tip: Ask any contractor bidding on spall repair whether they’ve seen the engineer’s condition report. If they haven’t, they’re quoting blind.
What Are the Repair Stages for Spalling Concrete?
A properly sequenced concrete spall repair follows a set order, and skipping steps is the single biggest reason repairs fail within a few years. Here’s the sequence worth checking against any quote you receive:
- Condition survey and photo record. A legitimate quote references documented spall locations, sizes, and depths, not a rough estimate from a site walk.
- Stop the source water first. If moisture is still tracking into the concrete through a failed waterproofing membrane or a cracked drainage detail, any repair placed over it will delaminate again. This step gets skipped more than any other, and it’s the reason repeat spalling happens in the same spot within a year or two.
- Perimeter sawcut and removal. Contractors cut a clean perimeter around the unsound concrete rather than chipping to a feather edge, which prevents the repair patch from thinning out and cracking at its own boundary.
- Rebar cleaning and treatment. Exposed steel gets wire-brushed or abrasive-blasted back to bright metal, then coated with an anti-corrosion primer. If section loss is significant, the accepted fix is splicing in new reinforcement sized by a professional engineer, not just coating over what remains.
- Bond coat and material placement in lifts. Repair material goes on in limited lift thicknesses to avoid sagging or slumping, following ACI/ICRI field procedures for substrate saturation and placement.
- Finish and protective coating, then verification. Reputable contractors run a pull-off bond test after cure, targeting roughly 1 MPa bond strength as a quality benchmark under ICRI guidance.
Ask for these in writing:
- Photo documentation before and after removal.
- The specific bonding agent and repair material by product name.
- A stated lift-thickness limit and cure schedule.
- Confirmation of a post-repair bond test.
Which Repair Materials Suit Which Severity Level?
Material selection depends almost entirely on how deep and how structural the damage is, and mismatched materials are a common cause of repeat failure.
- Minor spalls (shallow, non-structural): Neat Type VIII epoxy or epoxy mortar works well for small, shallow patches. TxDOT’s repair procedures specify strict mixing ratios and lift limits, and explicitly caution against using these systems for structural repairs because their thermal expansion rate doesn’t match parent concrete closely enough for load-bearing use.
- Intermediate to structural repairs: Polymer-modified structural mortars are formulated to match the modulus of elasticity of surrounding concrete, which matters because a stiffness mismatch is exactly what causes bond-line cracking later. For deeper or full-depth sections, batched concrete with a matching mix design is the standard, often with anchors or dowels tying the new pour to sound substrate.
- Large vertical or overhead areas: Low-pressure spray application or shotcrete lets crews build up thickness in controlled layers without the material sagging off a soffit. This method demands an experienced applicator; poor nozzle technique traps air voids that show up as hollow spots months later.
Pro Tip: If a contractor proposes the same epoxy patch material for a hairline crack and a load-bearing column repair, ask why. One product rarely suits both jobs.
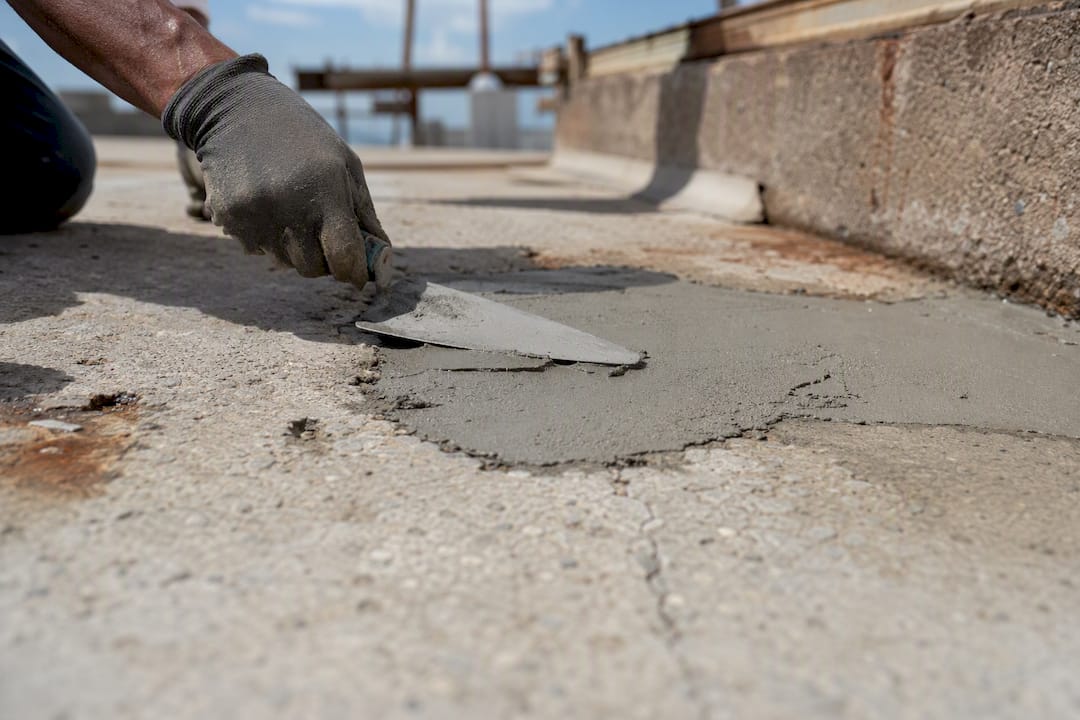
Material compatibility matters more than most owners realize. A repair mortar with a different thermal expansion rate than the surrounding concrete will move at a different rate through Singapore’s daily heat cycles, and that differential movement is what eventually pops a “successful” patch loose.
How Do You Prevent Spalling Concrete From Coming Back?
Repair without prevention just buys time. Fixing the water source that caused corrosion in the first place, whether that’s failed waterproofing, a blocked drain, or a cracked sealant joint, has to happen before or during the repair, not after.
- Waterproof and reseal any joints or membrane failures feeding water toward reinforcement.
- Apply an anti-carbonation or waterproof coating system to exposed concrete, and recoat on the manufacturer’s stated schedule rather than waiting for visible failure.
- Inspect at a routine cadence: sounding surveys, photo records, and targeted testing when a new sign appears.
- For structures with widespread chloride contamination, cathodic protection or realkalization can offer a longer-term fix than patch-by-patch repair, though these are specialist interventions an engineer should recommend, not default to.
Owners dealing with spalling in wet or immersed conditions, like pool decks or water features, face a related but distinct failure mode worth understanding separately; pool spalling follows similar corrosion logic but different exposure conditions.
How Much Does Spalling Concrete Repair Cost and Take?
Time and cost scale with the size of the spall and how much of the sequence above gets triggered, not just the visible patch area.
- Small repairs (under roughly 0.5 square meters, cosmetic or shallow) typically wrap in a day or two, including cure time for epoxy systems.
- Medium repairs (roughly 0.5 to 2 square meters, often involving some rebar exposure) usually run several days once you factor in surface prep, primer cure, and mortar cure before finishing.
- Large or structural repairs (over 2 square meters, or anything requiring rebar splicing) can extend to weeks, particularly when batched concrete needs a multi-day cure period before load can return.
Costs shift with access difficulty, scaffolding or hanging platform requirements, formwork for vertical or overhead placement, any NDT or lab testing ordered by the engineer, and professional fees for the specification itself. A cheap quick patch that skips primer and source-water fixes will cost less upfront and fail sooner. Specification-complete repairs that include proper rebar treatment and matched mortar typically outlast quick patches by a decade or more.
What Should a Repair Specification Actually Include?
A repair specification worth paying for spells out material types by product name, lift thicknesses, cure schedules, and the bond-test method used for sign-off. It should also state clearly whether the scope needs authority submission, which applies whenever a structural element or fire-rated component is involved.
Aectechnicalsg’s engineering scope covers condition surveys, structural repair specifications, FRP strengthening where reinforcement can’t simply be spliced, and coordination of authority submission support when a repair touches a load-bearing element. Consultants also coordinate waterproofing scope alongside the repair itself, which matters because a contractor fixing concrete and a separate contractor fixing the roof membrane above it rarely talk to each other, and that gap is where repeat failures come from.
A repair spec that doesn’t name the bonding agent, the lift limit, and the verification test isn’t a specification. It’s a guess with a price tag attached.
Why Specification-Led Repair Beats a Quick Patch Every Time
The conventional advice on spalling concrete repair treats it as a materials question: pick the right epoxy or mortar and you’re done. That’s backwards. The material choice matters, but it’s the third or fourth decision in the sequence, not the first. The repairs that fail within two years almost never fail because someone picked the wrong product. They fail because nobody fixed the water source, or nobody checked how much section loss the rebar had before covering it back up.
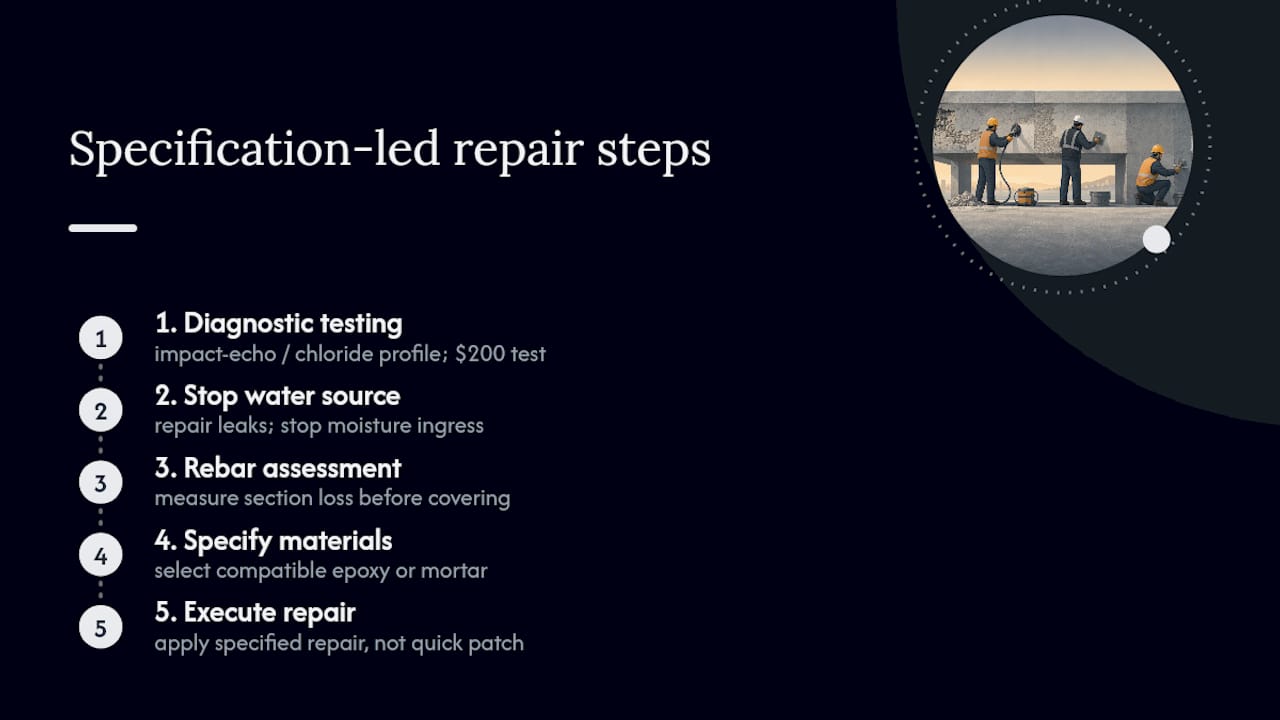
What gets underrated is the diagnostic phase. Owners want a patch, contractors want to sell a patch, and the impact-echo survey or chloride profile test that would tell you whether you’re looking at a five-year fix or a fifty-year fix gets skipped because it costs money upfront. That’s the wrong economy. A $200 diagnostic test that changes your repair scope is cheaper than redoing a repair job in three years.
If you take one thing from this guide, prioritize the assessment over the aesthetics. A patch looks fine in photos for a while regardless of whether it was done right.
— Aman
Get a Site Assessment and Repair Specification From Aectechnicalsg
You’ve got two paths once spalling shows up: hire a general contractor for a quick patch, or bring in an engineer to diagnose the cause and write a specification the contractor then executes. Aectechnicalsg exists for the second path, and it’s the one that avoids paying for the same repair twice. Rather than guessing at material choices, you get a site visit, a written condition report, a repair specification naming exact products and lift limits, and coordination with your contractor through execution.

When the damage touches a structural element, Aectechnicalsg also handles the PE endorsement and authority submission process so the paperwork doesn’t stall your repair timeline. If you’re looking at a spall you’re not sure about, start with the types of engineering consultancy available and request a site assessment before committing to any contractor’s quote.