
Curtain wall inspection is the systematic assessment of a building’s glazed envelope, covering glass, framing, sealants, gaskets, and the concealed anchors that hold the system to the structure. The baseline frequency, per Building and Construction Authority (BCA) guidance and SS 654, is at least once every five years, with older or distressed facades requiring closer attention. Assessments generally fall into three tiers:
- Level 1 — visual and document review, low cost, broad coverage
- Level 2 — targeted disassembly and field testing where Level 1 flags concerns
- Level 3 — full structural and performance analysis for remediation design
Key Takeaways
Curtain wall inspection works because matching the right tier, Level 1, 2, or 3, to a facade’s age and condition catches structural and water intrusion risks before they become expensive repairs.
| Point | Details |
|---|---|
| Set your baseline | Schedule routine inspections periodically, with increased frequency for older facades showing more wear or risk factors. |
| Match the level to the risk | Start with Level 1 visual review; escalate to Level 2 testing or Level 3 analysis only when triggers appear. |
| Test water infiltration properly | Use ASTM E1105 for reliable results; treat AAMA 501.2 hose tests as diagnostic only. |
| Document sampling scope | State exactly what percentage of the facade was inspected and what was excluded. |
| Use a full-service consultant | Aectechnicalsg carries findings from Level 1 review through PE endorsement and authority submission. |
Table of Contents
- What Does a Curtain Wall Inspection Actually Cover?
- Choosing the Right Inspection Level for the Job
- Field Tests That Confirm What the Eye Can’t Catch
- The Level 1 Site Checklist Every Inspector Should Carry
- Turning Findings Into a Report Worth Acting On
- How AECTechnicalSG Supports the Full Inspection Workflow
- Aectechnicalsg’s Inspection and Compliance Services
- Sources
What Does a Curtain Wall Inspection Actually Cover?
A competent inspection checks every load path and every seal, not just the glass surface. That means glazing units, gaskets, sealants (often EPDM), mullions and transoms, anchors and brackets, spandrel panels, weep holes and drainage channels, and the insulation and interface connections where the curtain wall meets slab edges or roofing.
Each component fails differently. Cracked sealant lets water past the primary seal and into the wall cavity, where it corrodes steel anchors long before anyone sees a stain. A misaligned mullion signals movement in the anchor system, a structural concern rather than a cosmetic one. Blocked weeps trap water that should drain out, accelerating frame corrosion and gasket breakdown. Failed spandrel insulation quietly increases energy loss without any visible defect at all.
- Glazing: seal failure, delamination, cracked units
- Gaskets and sealants: shrinkage, cracking, loss of adhesion
- Anchors and brackets: corrosion, loosening, concealed fastener fatigue
- Drainage and weeps: blockage, reverse slope, debris buildup
- Spandrel panels and insulation: moisture ingress, thermal bridging
Interior clues matter as much as exterior ones. Moisture stains, corrosion on interior mullion covers, or discoloration near ceiling lines often trace back to a failure point several floors above where the stain appears.
Pro Tip: Walk the interior before you walk the exterior. A five-minute interior scan tells you where to focus your close-up exterior inspection, saving hours of blind sampling.
Choosing the Right Inspection Level for the Job
Not every facade needs the same depth of scrutiny, and picking the wrong level either wastes budget or misses a structural problem. The industry groups curtain wall assessment into three escalating tiers, and knowing which one applies is the first real decision a site manager makes.
- Level 1: visual and document review. Non-invasive walkarounds, photographic documentation, and a check against original design drawings and maintenance records. This tier relies on representative sampling rather than full disassembly and catches the majority of visible defects at low cost.
- Level 2: targeted disassembly and field testing. Inspectors remove select glazing units or interior finishes to check anchors and fasteners directly, then run field water infiltration tests to confirm suspected leak paths. This is where selective disassembly reveals concealed anchor corrosion that no visual check would ever catch.
- Level 3: structural and performance analysis. Engineers run structural calculations, wind load modeling, and thermal performance analysis, then produce a full remediation design. This tier follows a Level 2 finding that points to a genuine structural or code compliance issue.
Escalation triggers are fairly consistent across projects: facades older than 20 years, visible distress like glass cracking or panel bowing, repeated leakage complaints from the same stack, or exposure to an extreme weather event. Any one of these should push a Level 1 review toward Level 2, according to ASTM E2270 assessment level guidance.
Field Tests That Confirm What the Eye Can’t Catch
Visual inspection tells you where a problem might be. Field testing tells you whether water is actually getting through, and standardized methods exist specifically so results hold up under scrutiny.
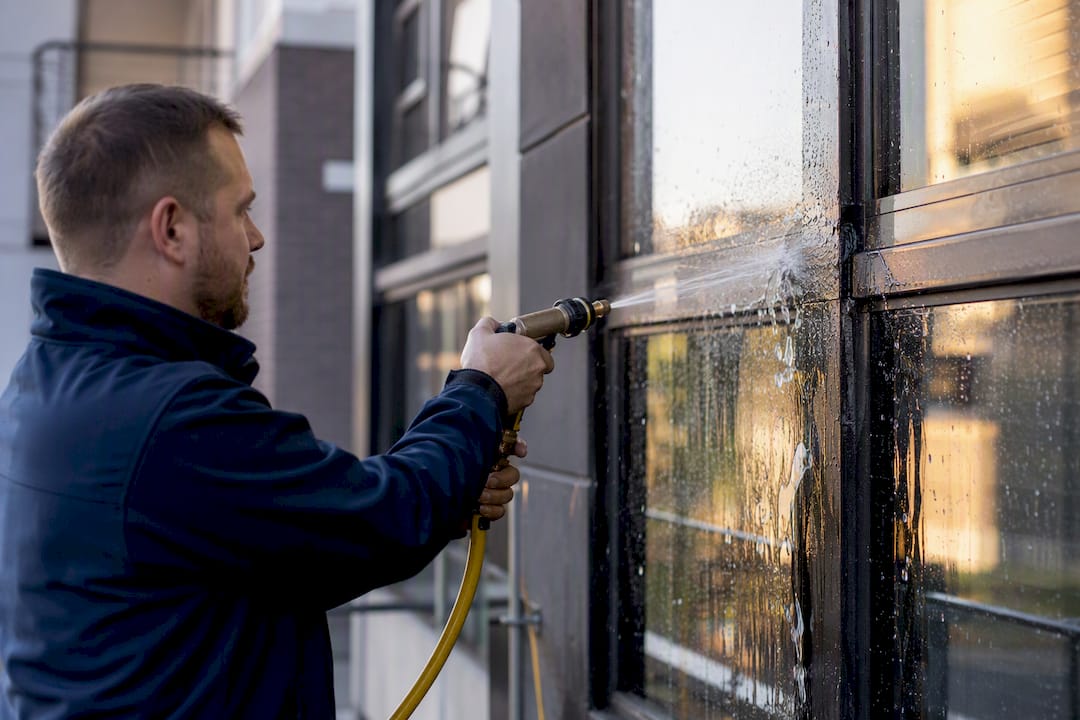
ASTM E1105 is the strongest field simulation available: it combines a static air-pressure differential with calibrated spray racks to mimic wind-driven rain, and it produces results that translate reasonably well to real storm conditions. AAMA 501.2 hose testing is faster and cheaper, but it’s a diagnostic tool with real limits. Without documented calibration, nozzle type, pressure, and spray distance, labs frequently reject the results outright.
Beyond water testing, a few other tools round out the field kit:
- Infrared thermography to spot thermal bridging and hidden moisture pockets behind spandrel panels
- Moisture meters for quantifying dampness in insulation and interior finishes without opening up the wall
- Dye tracing to confirm a specific leak path when multiple penetrations are suspects
- Mock-up and laboratory testing for new curtain wall systems before installation, versus on-site field tests for existing buildings already in service
Statistic Callout: Facades older than 20 years typically warrant 100% general visual inspection plus 25% close-up detailed inspection of the total facade area, a sampling rule that shows up repeatedly in periodic inspection guidance.
Whatever method you choose, document the acceptance criteria against the governing standard before testing begins, not after. A test without a stated pass/fail threshold is just data with no conclusion attached.
The Level 1 Site Checklist Every Inspector Should Carry
A Level 1 inspection lives or dies on consistency. Walking a facade without a structured checklist means every inspector notices different things, and comparisons between annual reviews become meaningless.
- Frame alignment — check mullions and transoms for visible bowing, twisting, or gaps at joints.
- Glazing condition — scan for cracks, delamination, fogging between panes, and broken seals.
- Sealant and gasket state — look for shrinkage, chalking, loss of adhesion, and open joints.
- Anchor evidence — note rust staining or streaking below brackets, a strong sign of corrosion inside.
- Drainage and weeps — confirm weep holes are clear and unobstructed by sealant, debris, or paint.
- Spandrel finishes — check for panel discoloration, bulging, or fastener staining.
- Interior correlation — cross-reference any exterior findings with interior stains or corrosion noted earlier.
Sampling guidance follows a consistent pattern across BCA facade inspection standards: 100% general visual coverage of the facade, stepping up to 25% close-up inspection for buildings over 20 years old. Increase that percentage further wherever the general scan turns up clustered defects, since problems on one elevation rarely stay isolated.
Triage findings into three buckets on-site rather than waiting for the report: safety-critical defects (loose panels, failing anchors) that need immediate barricading or repair, active water intrusion that needs prompt Level 2 follow-up, and cosmetic issues that can wait for the next maintenance cycle. Our field guide to facade deterioration signs breaks down what each defect type looks like in practice.
Pro Tip: Photograph every defect with a scale reference, a tape measure, a coin, anything with a known size, in frame. Photos without scale are nearly useless when someone reviews the report six months later.
Access, Sampling, and Safety on High-Rise Facades
Getting eyes on a facade safely shapes how thorough an inspection can actually be. Drone surveys work well for macro-condition mapping across a whole elevation quickly, but they can’t replace close-up anchor inspection or water testing for Level 2 work. Boom lifts and swing stages suit mid-height detailed checks, while rope access or cradles are typically necessary for full close-up defect mapping on tall towers.
- Drone survey: fast macro triage, no physical contact with the surface
- Boom lift or swing stage: mid-height detailed inspection with hands-on access
- Rope access or cradle: comprehensive close-up mapping on high-rise elevations
Whatever access method is chosen, crews need relevant competency certification, valid permits, and coordination with building operations to avoid disrupting occupants below.
Turning Findings Into a Report Worth Acting On
A defect list without prioritization is just a list. A useful report tells the reader what matters most and what to do about it.
The core structure should include an executive summary, photographic evidence with location markers, a defect register, severity ratings, recommended next steps (including whether Level 2 or Level 3 escalation is warranted), and a cost order-of-magnitude estimate for repairs. Report deliverables should also state sampling limitations clearly: what percentage of the facade was actually inspected, what areas were excluded, and why.
- Executive summary with overall condition rating
- Defect register with severity classification
- Photographic evidence with location markers and scale
- Sampling scope and stated exclusions
- Recommended follow-up level and estimated cost range
Structural analysis or a professional engineer’s endorsement typically comes into play once a Level 2 finding suggests a load path or anchorage concern, since remediation design at that stage needs to be signed off before it reaches the authorities. Our construction compliance checklist covers how these findings typically flow into regulatory submissions.
| Point | Details |
|---|---|
| Report clarity | State sampling percentage and exclusions explicitly to avoid disputes later. |
| Severity ratings | Rank each defect so owners can prioritize repair budgets by risk, not by list order. |
| Escalation path | Flag when a finding needs Level 2 disassembly or Level 3 structural review. |
How AECTechnicalSG Supports the Full Inspection Workflow
AECTechnicalSG works across the entire inspection chain, from desktop document review through Level 2 field testing to Level 3 structural analysis and PE endorsement for authority submissions. That continuity matters because a finding that starts as a Level 1 observation often needs a licensed engineer’s sign-off before repair drawings can go to BCA or URA.
A facade defect that gets caught at Level 1 and resolved before it escalates costs a fraction of what the same defect costs after five more years of water intrusion.
- Desktop review and Level 1 visual inspection with structured checklists
- Level 2 field water infiltration testing and targeted disassembly
- Level 3 structural calculations and performance modeling
- PE endorsement and full authority submission management
Building owners working with facade engineers on fenestration and facade engineering fundamentals will recognize this as the same technical rigor applied end-to-end, rather than handed off between separate consultants at each stage.
Practitioner perspective: what teams routinely miss
Most inspection failures aren’t testing failures, they’re sampling failures. Teams rely on hose tests alone because they’re cheap, then skip the interior walkthrough that would have told them where to look in the first place. Schedule fieldwork during moderate weather, spring or fall, since sealants under thermal stress mask real defects. Correlate every interior stain with an exterior counterpart, and keep removed samples labeled and stored, not discarded, until the report is finalized.
— Aman
Aectechnicalsg’s Inspection and Compliance Services
Aectechnicalsg is the practical alternative to piecing together separate contractors for inspection, structural review, and authority submission. Where most facade inspections stall at a defect list with no clear next step, Aectechnicalsg carries findings straight through to PE endorsement and submission to BCA, URA, or SCDF without handing the file to a different firm mid-process.

That matters most for buildings crossing the 20-year mark, where a Level 1 finding frequently turns into a Level 2 or Level 3 engagement, and switching consultants between tiers adds delay owners can’t afford once water intrusion is active. Property developers and building owners exploring the range of engineering consultancy options available can scope a facade inspection alongside structural and M&E review in a single engagement. If your facade is due for its five-year review, or has already shown signs of distress, request a scoped inspection quote to get a clear cost estimate before committing to the full assessment.
Sources
- Building and Construction Authority (BCA) facade inspection guidance
- Assessing Curtain Walls — technical overview (NABIE)
- Curtain Wall Maintenance and Performance Degradation Management (industry guidance)