
A water seepage investigation identifies the exact source of moisture intrusion through desk study, visual inspection, and targeted testing, then produces a documented basis for repair. If you suspect seepage, photograph the damage with timestamps, limit access to the affected area, and avoid patching or repainting until an inspector has recorded the evidence. Standard tests and, where warranted, Joint Office procedures typically follow.
TL;DR:
- Water seepage should be investigated through a staged approach, starting with desk review and visual inspection before progressing to advanced tests.
- Distinguishing between seepage and leakage is critical, with passive monitoring for seepage and active testing for leakage to avoid wasted effort.
- Conventional field tests like dye water, ponding, spray, and pressure tests remain fundamental, often paired with advanced technologies such as microwave tomography and thermography.
- Proper documentation, including raw data, annotated maps, and environmental conditions, is essential for credible results and dispute resolution.
- Owner responses should prioritize prompt inspection and evidence preservation, avoiding patching or repainting before professionals assess the damage.
Table of Contents
- What Does a Water Seepage Investigation Cover?
- Seepage vs Leakage: Why the Difference Changes Your Testing Strategy
- What Are the Standard Field Tests for Water Seepage?
- How Do Microwave Tomography and Infrared Thermography Improve Investigations?
- How Do You Measure and Document Seepage So Findings Hold Up?
- Who Should You Hire, and What Questions Should You Ask?
- What Are Realistic Remediation Timelines and Costs?
- What Regulatory Procedures Should Owners Expect?
- What Should a Practitioner Checklist Look Like?
- An Editor’s Take on the Biggest Mistake Owners Make
- How Aectechnicalsg Supports Seepage Investigations and Repairs
- Sources
What Does a Water Seepage Investigation Cover?
A water seepage investigation moves through a deliberate sequence, and skipping a stage is the single most common reason repairs fail on the first attempt. Investigators do not walk in and start drilling test holes. They build a case first, the way a claims adjuster builds a case before approving a payout.
Desk study comes first. The inspector pulls building plans, plumbing layouts, past maintenance records, and any prior complaint history for the unit or the floors above and below it. A leak that reappears eighteen months after a “repair” often traces back to a defect the original contractor never actually fixed. Chronology matters here: when did the stain first appear, does it worsen after rain, and has any renovation work happened upstairs recently.
Visual inspection and symptom mapping follow. This is where a trained eye earns its fee. Inspectors record the shape, color, and edge pattern of stains; whether there is a musty odor; whether efflorescence (the white, chalky mineral deposit left by evaporating water) is present; and how the damage correlates with weather or usage patterns. A stain with sharp, defined edges that appears only after heavy rain points toward a different source than a slow, spreading discoloration that persists regardless of weather.
From there, investigations typically escalate through three recognizable stages, an approach outlined in professional guidance on water seepage used across the industry:
- Stage I: Desk review plus non-intrusive visual inspection, often resolving straightforward cases without further testing.
- Stage II: Standard field tests, such as colour water tests or ponding, applied when the source isn’t visually obvious.
- Stage III: Advanced non-destructive testing or intrusive investigation, reserved for cases where Stage II results are inconclusive or the seepage crosses unit boundaries.
Authority involvement tends to enter at Stage II or III, particularly when the seepage affects a neighboring unit and the parties can’t agree on the source. Several roles typically contribute across these stages: a licensed plumber handles supply and drainage checks, a building technologist or surveyor manages the structural and envelope assessment, a non-destructive testing (NDT) specialist runs advanced scans when needed, and government bodies like the Joint Office step in when disputes require formal mediation.
Seepage vs Leakage: Why the Difference Changes Your Testing Strategy
Seepage and leakage look similar on a stained ceiling but behave completely differently, and testing the wrong one wastes time and money.
Seepage is gradual moisture migration through a porous material, concrete, masonry, or waterproofing membrane, driven by capillary action or hydrostatic pressure rather than a pressurized source. It shows up as damp patches, gradual discoloration, or mold growth that develops over weeks. Leakage is an active, usually pressurized escape of water from a pipe, joint, or fitting, and it tends to announce itself with visible drips, pooling, or a sudden spike in a water meter reading.
That distinction drives which tests actually apply:
- Suspect seepage? Start with passive monitoring: moisture meters, mapping over several days, and observation of how dampness tracks with rainfall or humidity.
- Suspect leakage? Move straight to active tests: reversible pressure testing on supply pipes or dye tracing on drains, since passive monitoring won’t catch a fast, localized failure.
- Unsure which you’re dealing with? Run a short observation period first. If the moisture pattern stays constant regardless of water use, it’s seepage. If it spikes when a specific fixture runs, it’s leakage.
The practical stakes go beyond diagnosis. Leakage from a burst or corroded pipe often qualifies for different insurance treatment than slow seepage through a failed waterproofing membrane, and liability between neighboring units frequently hinges on which one an investigator documents. Distinguishing the two early keeps the insurance and dispute paperwork grounded in evidence rather than guesswork.
Pro Tip: If the dampness appears only during or right after rain and dries out completely within a day or two on sunny days, you’re almost certainly looking at seepage through the envelope rather than a plumbing leak. Log the pattern for at least one full rain cycle before commissioning invasive tests.
What Are the Standard Field Tests for Water Seepage?
Five conventional tests form the backbone of most seepage investigations, and Joint Office practice still relies on them even as advanced technology becomes more common. Each test targets a specific building element and produces a fairly binary result: water appears where it shouldn’t, or it doesn’t.
Colour water test targets drainage pipes and traps. Investigators introduce colored dye into a suspected drain line and watch for its appearance at the point of seepage below. A positive result, colored water emerging at the stain, confirms the drainage pipe as the source with high confidence. A negative result doesn’t clear the pipe entirely; it just means the leak point wasn’t reached during that test window.
Ponding test checks floor slabs and balconies for waterproofing failures. Inspectors dam a section of floor, flood it with a measured depth of water, and leave it for a set period, monitoring the underside for seepage. Spray test does the equivalent for vertical surfaces: a controlled water spray simulates rainfall against an external wall while the interior face is watched for moisture ingress.
Reversible pressure testing isolates a section of water supply pipe and pressurizes it above normal operating pressure to check for pinhole leaks or joint failures that don’t show up under normal flow. It’s called reversible because the pipe returns to normal service once the test concludes, unlike a destructive test that requires cutting into the pipe.
Moisture mapping ties these individual tests together. Investigators walk the affected area with a moisture meter, recording readings at a grid of points, then compare that map against dry reference zones elsewhere in the building. Basic infrared thermography sometimes supplements this step, though interpreting a thermal image correctly takes real training, since temperature differences can come from insulation gaps or air movement rather than moisture at all.
Why combine methods rather than run one test and call it done? Because official Joint Office investigations consistently pair conventional tests with each other, and increasingly with advanced technology, precisely because no single test rules out every possible source. A colour water test can clear the drainage system while a ponding test reveals the actual waterproofing failure two floors up. Common test combinations include:
- Colour water test paired with drain camera inspection for suspected sewage or waste line failures.
- Ponding test paired with moisture mapping to confirm waterproofing membrane integrity on roofs and balconies.
- Reversible pressure test paired with acoustic leak tracing when a supply line runs through an inaccessible wall cavity.
How Do Microwave Tomography and Infrared Thermography Improve Investigations?
Advanced non-destructive technologies solve a problem conventional tests can’t: they let investigators see inside a wall or slab without cutting into it or entering the unit above.
Microwave tomography (MT) sends microwave signals into concrete and measures how moisture at different depths alters the signal’s behavior. Analysts typically examine three probe depth ranges, roughly 0 to 30 millimeters, 0 to 70 millimeters, and 0 to 110 millimeters, and compare the wet-to-dry ratio at each depth against a known-dry reference area elsewhere in the building, according to a technical paper on microwave tomography presented at the World Conference on Non-Destructive Testing. A wet reading that’s strong at 30 millimeters but fades by 110 millimeters suggests a shallow seepage path, useful information for deciding whether a repair needs to address only the surface finish or the full slab depth.
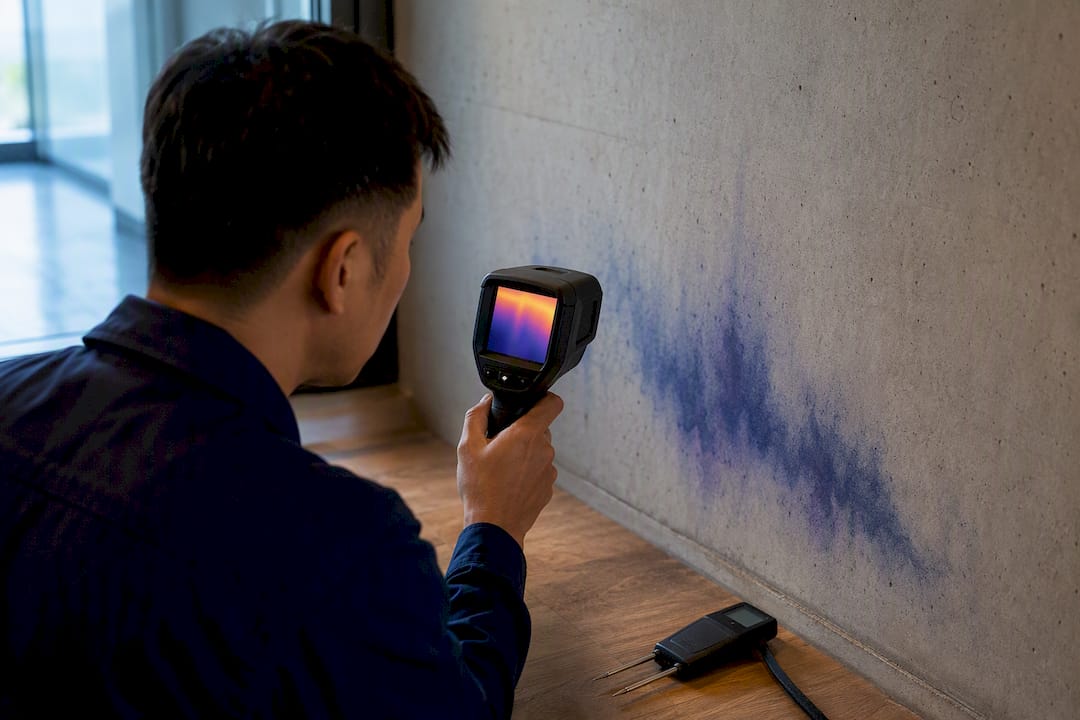
Infrared thermography reads surface temperature contrasts. Wet areas typically show up cooler than surrounding dry material because evaporating moisture pulls heat from the surface, though the effect depends heavily on ambient conditions, time of day, and the material’s surface finish. A glossy tile surface reflects heat differently than raw concrete, which is exactly why thermal readings need a trained interpreter rather than a point-and-shoot approach.
Acoustic leak-tracing methods listen for the sound signature of pressurized water escaping a pipe, useful for locating a supply-line failure inside a wall cavity without demolition.
The genuine advantage of these three methods together is access. Since mid-2025, official investigation practice has applied microwave tomography and infrared thermography specifically because non-destructive scanning reduces how often an investigator needs to enter the unit above a suspected seepage source, which can otherwise turn into a scheduling and access negotiation that drags a case out for months.
That said, these technologies have real limits. Small, localized seepage points can fall below the resolution these tools reliably detect. Tile finishes and embedded rebar both distort microwave and thermal readings in ways that require experienced interpretation to untangle. A combined-methods report that cross-references MT depth ratios against thermal imaging and, where relevant, a conventional test, carries far more evidentiary weight than a single scan presented on its own.
- Non-destructive tech works best as a screening tool that narrows where an intrusive check, if still needed, should happen.
- It rarely replaces a physical test entirely when the case involves cross-unit disputes or formal authority submission.
- Vendor proposals that promise a single scan will “definitively” locate every seepage source deserve a second opinion.
Pro Tip: Ask any contractor proposing microwave tomography to show you the wet/dry ratio comparison across all three probe depths, not just a single color-coded image. The depth comparison is what actually tells you whether the seepage is shallow or has migrated deep into the slab.
How Do You Measure and Document Seepage So Findings Hold Up?
A finding is only as strong as the documentation behind it, and this is where a lot of otherwise competent investigations fall apart under scrutiny, whether that scrutiny comes from an insurer, a neighbor’s lawyer, or a strata committee arguing over who pays.
Follow a repeatable protocol from the first visit:
- Establish a dry baseline first. Take moisture readings in an unaffected area of the same material, concrete, plaster, or tile, before recording readings at the suspected seepage point. Without a baseline, a moisture meter reading of “18%” means nothing on its own.
- Use the right tool for the material. Pin-type meters that measure electrical resistance work well on wood and drywall but can damage tile or finished surfaces. Non-invasive capacitance meters read through a finished surface without puncturing it, though they read shallower depths than pin meters.
- Log readings at fixed intervals, not just once. A single reading captures a moment; a logging interval of daily or twice-daily readings over a week captures a trend, which is far more useful for distinguishing an active leak from a slowly drying residual patch.
- Photograph and video with metadata intact. Every image should carry an embedded timestamp and, ideally, a geotagged location. A photo with no date attached is close to worthless if the case ever goes to mediation or a tribunal months later.
- Record ambient conditions alongside every reading. Humidity and recent rainfall both affect moisture readings, so a report that lists a bare percentage without noting the day’s weather makes for weak evidence.
The finished report should include the dry baseline data, every logged reading with its date, the raw sensor output (not just a summary interpretation), annotated photos, a floor plan marking exactly where each reading was taken, and a clear statement connecting the physical evidence to the probable source. This structure mirrors the documentation standards used broadly across water-damage assessment practice, where moisture mapping and category classification determine whether affected material needs drying or replacement. Raw readings matter because a summary conclusion without the underlying numbers is difficult to challenge or verify, and that cuts both ways in a dispute.
Who Should You Hire, and What Questions Should You Ask?
Choosing the right provider matters more than most owners realize, because an incomplete investigation doesn’t just waste money, it can produce a confident-sounding conclusion that’s flat wrong.
Several provider types typically play complementary roles rather than one firm covering everything:
- Licensed plumbers handle supply and drainage-specific testing, including colour water tests and pressure testing.
- Building surveyors or technologists manage the structural and envelope assessment, including waterproofing membrane checks.
- NDT specialists operate microwave tomography, thermography, or acoustic equipment when the case calls for non-destructive scanning.
- Consulting engineers get involved when the root cause implicates structural elements, façade systems, or requires formal reporting for authority submission.
Before commissioning any of them, ask direct questions: What specific tests will you run, and why those over the alternatives? Will I receive the raw data, or only a summary conclusion? What is the expected timeline from first visit to final report? Does your quote include professional indemnity insurance, and can you provide proof of it? What happens if the first round of testing is inconclusive, does that trigger additional cost automatically?
Watch for a handful of red flags. A contractor who proposes starting repairs before any documented testing is either overconfident or cutting corners, and either way you lose the evidence trail. A proposal that names one single test as sufficient to close out a cross-unit dispute is almost always overselling its own certainty. And be wary of anyone who wants to patch or repaint the affected area during the initial site visit, since that’s often the same surface a colour water test or moisture map needs untouched.
Pro Tip: Ask for a sample report from a past, anonymized project before you sign anything. A provider who can’t produce one, or hands you a one-page summary with no raw data attached, is telling you exactly what your own report is going to look like.
What Are Realistic Remediation Timelines and Costs?
Once the source is confirmed, the repair path splits into three broad categories, and matching the right one to the actual finding is what separates a lasting fix from a callback six months later.
Waterproofing membrane repair applies when the investigation traces the seepage to a failed roof, balcony, or bathroom membrane. This is typically the least invasive of the three options, involving surface preparation, membrane reapplication, and a curing period, and it often finishes within one to two weeks for a single affected area.
Pipe replacement or repair applies when reversible pressure testing or a colour water test confirms a plumbing source. Scope varies enormously here: a single joint repair might take a day, while replacing a corroded section of common-property pipework serving multiple units can stretch to several weeks once access negotiations and any required authority notification are factored in.
Façade or structural repair applies when seepage traces to cracked render, failed sealant joints, or a structural crack in the external wall. These jobs tend to run longest, since they often require scaffolding or rope access and sometimes reveal secondary damage, like corroded rebar, once the surface is opened up.
Several factors drive cost and timeline beyond the repair itself:
- Access constraints add time and cost fastest. A repair requiring entry into a neighboring unit, or scaffolding on a high floor, can double the timeline compared to a straightforward interior fix.
- Investigation scope compounds the same way. A case that needs Stage III advanced testing before repair even starts naturally runs longer than one resolved at Stage I.
- Reinstatement work, patching tiles, repainting, restoring finishes, often costs more than the actual leak repair itself, and owners frequently underestimate this line item.
Budget for contingency, not just the quoted repair cost. A staged approach, fixing the confirmed source first and reassessing before committing to cosmetic reinstatement, protects against paying twice when a “minor” seepage case turns out to have a second, undetected source once the first repair is complete.
What Regulatory Procedures Should Owners Expect?
Government involvement in a seepage case usually follows a fairly predictable path, and knowing that path in advance saves a lot of frustration.
The Joint Office (JO), a coordinated body drawing on Buildings Department and Food and Environmental Hygiene Department (FEHD) resources, typically gets involved when a seepage complaint crosses unit boundaries and the parties can’t resolve it privately. The process usually starts with a Notification Letter to the party believed responsible for the source, giving them a window to investigate and address the issue voluntarily before formal testing begins.
If the informal window closes without resolution, JO investigators apply the staged testing approach: conventional methods first, escalating to advanced technology when conventional results are inconclusive or when entering the unit above would otherwise be required. Per official guidance, this authority-level testing has incorporated microwave tomography and infrared thermography since mid-2025 specifically to reduce disruption to residents while still producing evidence solid enough to support a formal notice.
Separately, the Buildings Department fields general inquiries about seepage causes and can clarify which authority handles which type of case, since drainage-related complaints, common-property plumbing, and structural envelope issues don’t all route through the same department.
A few practical points for owners deciding between private resolution and authority escalation:
- Private resolution moves faster when both parties cooperate and the source is straightforward, since it skips the formal notification and response windows.
- Authority escalation makes sense when a neighbor disputes responsibility, when access to another unit is refused, or when the case needs a formal record for insurance or legal purposes.
- A private consultant’s report can support either path, and a well-documented private investigation often speeds up an authority process rather than competing with it.
What Should a Practitioner Checklist Look Like?
A properly run investigation follows a sequence that rarely deviates, regardless of who’s managing it, and knowing that sequence helps you evaluate whether a consultant is actually doing the job right.
- Intake and desk study: collect building plans, maintenance history, and prior complaint records before any site visit.
- Initial site visit: visual inspection, symptom mapping, and dry baseline readings established on day one.
- Targeted testing: conventional tests first (colour water, ponding, spray, reversible pressure), escalating to advanced NDT only where warranted.
- Data consolidation: raw readings, thermal images, and MT depth comparisons compiled into a single defensible report.
- Remediation scope definition: a clear, prioritized repair recommendation tied directly to the confirmed source.
- Authority submission, if required: formal documentation prepared for JO, BD, or other relevant bodies.
Any consultant you engage should hand over raw data, not a one-line conclusion, along with annotated moisture maps and a remediation scope that specifies exactly what needs fixing and in what order. Multidisciplinary input consistently produces better root-cause findings than a single-specialty view: a structural engineer might catch a crack pattern a plumber would miss, while an M&E engineer can flag a supply-line routing issue that a building surveyor wouldn’t think to check. This is precisely where multidisciplinary engineering consultancy earns its value, coordinating structural, geotechnical, and M&E perspectives into one coherent investigation rather than three disconnected opinions.
| Deliverable | Why it matters |
|---|---|
| Raw moisture/thermal data | Lets a second party verify the conclusion independently |
| Annotated floor plan | Shows exactly where each test was performed |
| Dry baseline comparison | Confirms readings mean something against a known reference |
| Prioritized remediation scope | Prevents cosmetic fixes from masking the real source |
| Authority submission draft, if applicable | Speeds up formal review when a case escalates |
An Editor’s Take on the Biggest Mistake Owners Make
The single most common misstep isn’t a bad test or a wrong contractor. It’s timing. Owners wait for the stain to get bigger before calling anyone, or worse, they repaint over it hoping it won’t come back. Both choices destroy the evidence an investigator actually needs to do the job right, and both cost more in the long run than a prompt call would have.
Here’s a six-point checklist worth keeping by the door while you arrange a professional inspection:
- Photograph the affected area now, with a timestamp visible or embedded.
- Do not repaint, patch, or clean the stain before an inspector sees it.
- Note the date the stain first appeared and whether it worsens with rain.
- Limit foot traffic and access to the immediate area to avoid disturbing evidence.
- Check if the pattern correlates with any specific fixture use upstairs or nearby.
- Contact a qualified inspector within days, not weeks, of noticing the issue.
Documentation isn’t a formality. It’s the difference between a claim an insurer accepts on the first submission and one that drags through months of back and forth because nobody can prove when the damage actually started.
— Aman
How Aectechnicalsg Supports Seepage Investigations and Repairs
Chasing down a seepage source on your own, coordinating a plumber for one test, a surveyor for another, and then figuring out whether the findings even qualify for authority submission, eats weeks that a coordinated consultancy compresses into one engagement. Engineering consultancies bring structural, geotechnical, and M&E expertise together under one roof, so root-cause findings come from a single coordinated investigation rather than three contractors comparing notes after the fact.

A typical engagement starts with a site assessment and desk study, moves through targeted testing, conventional or advanced depending on what the case needs, and ends with a documented report that includes raw data, annotated mapping, and a defined remediation scope. When the findings require formal filing, Aectechnicalsg also manages the authority submission process directly, so property owners and building managers aren’t left translating a technical report into whatever format a regulator expects.
If you’re dealing with a seepage case that’s dragged on past a simple visual check, reach out to discuss a consultancy engagement and get a scoped investigation underway.
Sources
The Water Seepage Use of New Technologies page details official testing methods and confirms when microwave tomography and infrared thermography apply. The Buildings Department FAQ on water seepage explains common causes and how authorities route investigations. For the technical basis behind microwave tomography’s depth-based interpretation, the World Conference on Non-Destructive Testing paper walks through probe depth ranges and wet/dry ratio comparisons. The professional guide to water seepage outlines the staged desk study and testing approach that structures much of this article.
- Water Seepage – Use of New Technologies
- Microwave Tomography Technology for Water Seepage Investigation in Buildings
- Water Seepage Problem (Buildings Department FAQ)
- Professional Guide to Water Seepage